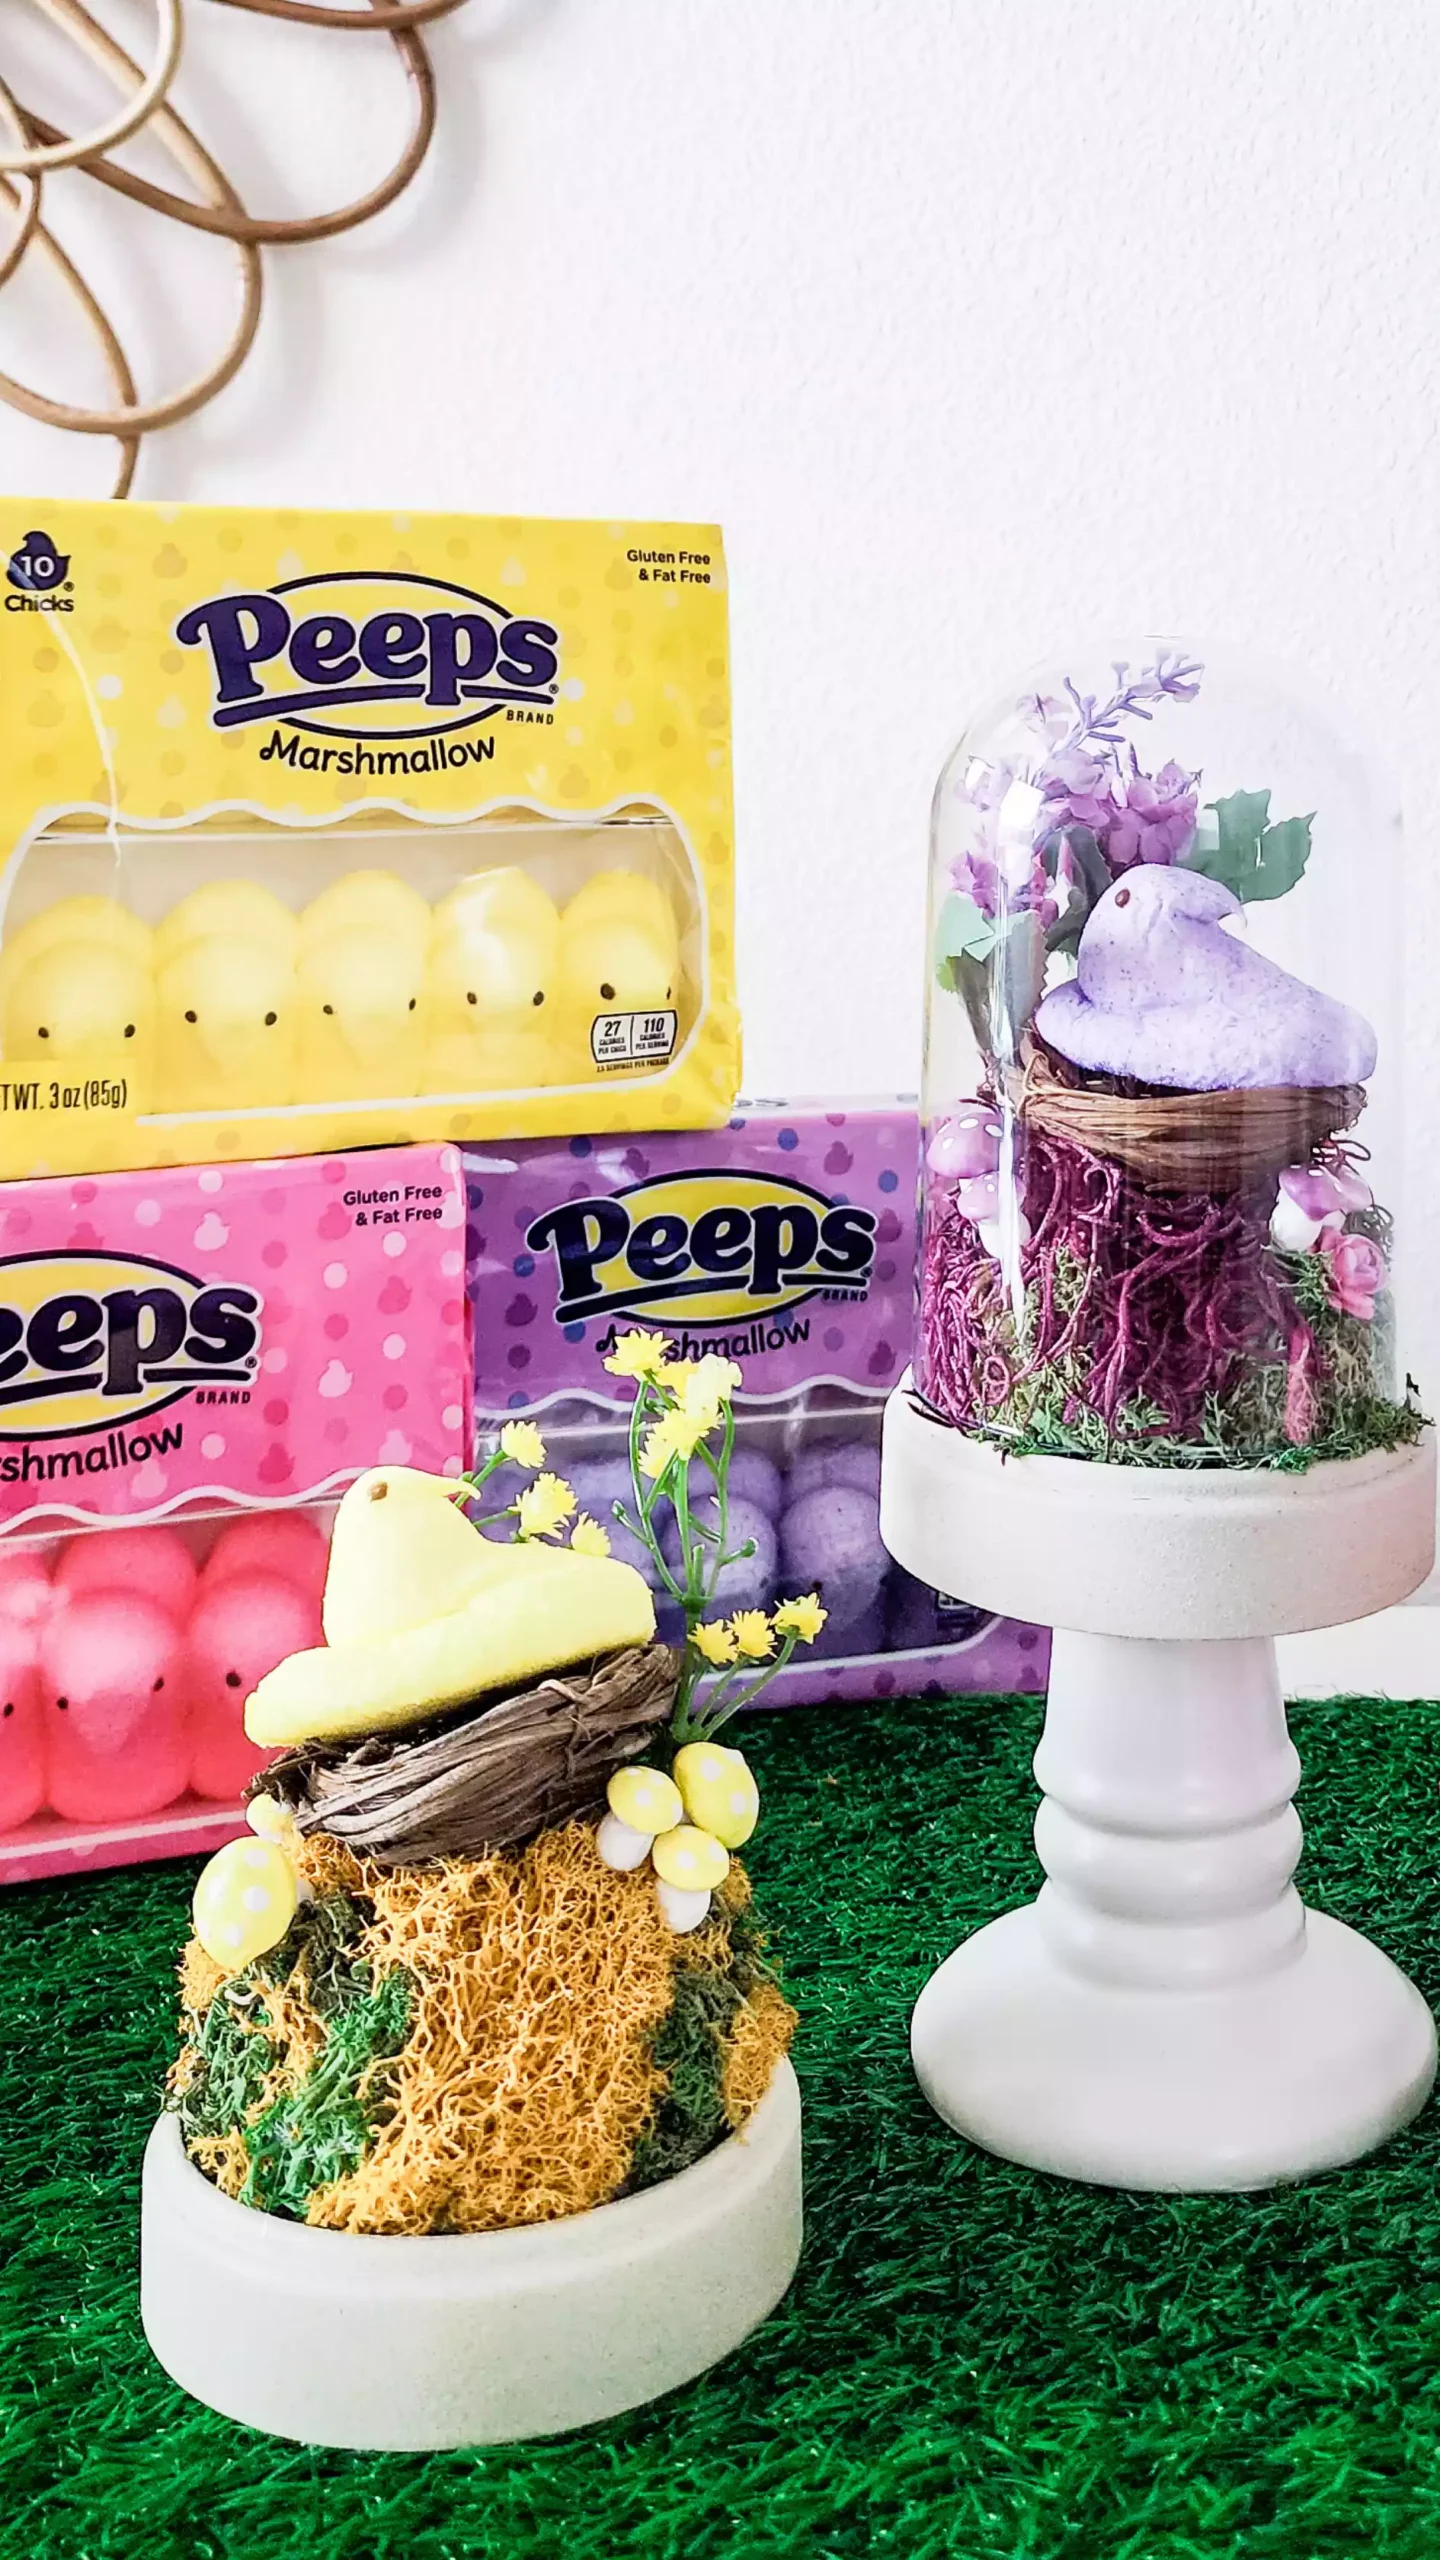
If you are changing the color of your cloche base, spray paint first to allow ample drying time.
Cut the styrofoam balls in half to fit the size of your base. Hot Glue onto the fully dry base.
Next, use hot glue to secure the moss, leaving a small space at the top of the styrofoam to glue the faux nest.
After adding the nest, add your embellishments such as faux flowers and mushrooms, being careful not to add too many so the cloche can still fit over top.
Add your PEEPS® Marshmallow Chick onto the nest (do not glue down so you can easily remove and replace for next Spring).
Lastly, carefully close the cloche and enjoy!
Tip: You can place one of the cloches on top of a candle holder to vary the heights.
Note: Use extreme caution when using hot glue. Completed craft is for decorative purposes only. Candy used in craft should not be eaten.
Share a Photo
Share if you loved this recipe as is, or if you added
your own #peepsonality.